Purpose
Place non-structural framing (studs) at a regular interval below a truss; these members can be used for TC framing, BC framing, interior framing, and level returns. You can also use this feature to apply structural stacked chords.
Steps
To add filler:
- Highlight the area of the truss where you want to add filler.
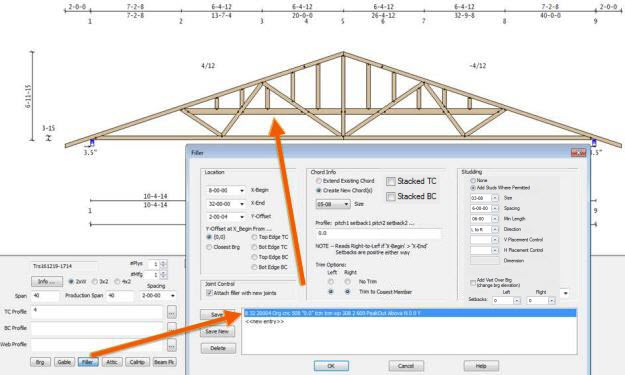
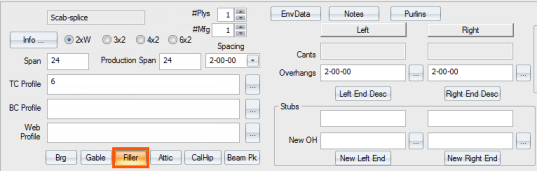
- In the Design workspace, click Filler. In the Layout workspace, select Filler from the Truss Modifications menu.
 Note: If no filler entries exist, the window displays preset values. If filler entries exist, the values for the first filler in the list displays.
Filler options include the following:
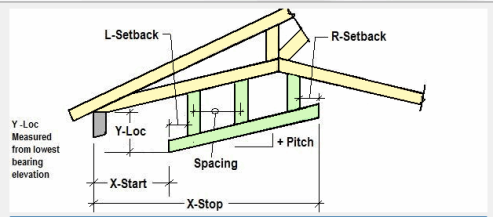
See the illustration below for more information.
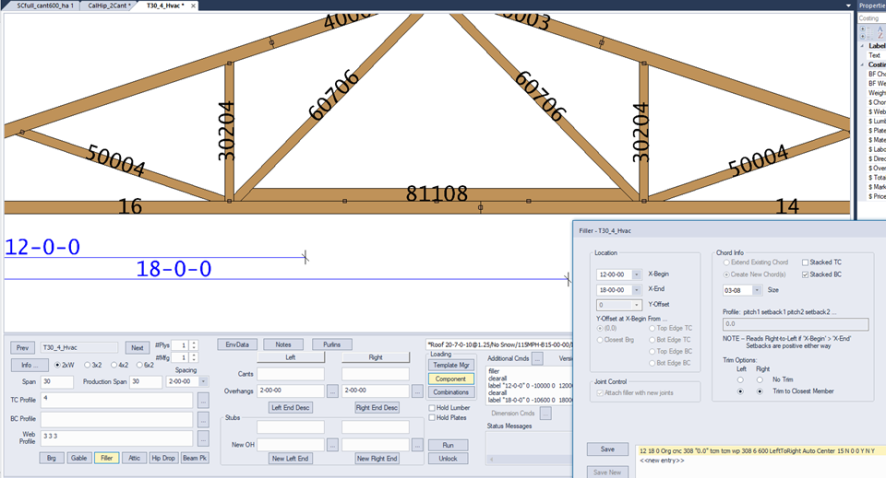
X-Begin - define the filler start location by selecting a dimension in the drop-down list or by entering a dimension in ffiiss. The start location is measured from the left end of the truss along the horizontal axis.
X-End - define the filler end location by selecting a dimension in the drop-down list or by entering a dimension in ffiiss. The end location is measured from the left end of the truss along the horizontal axis.
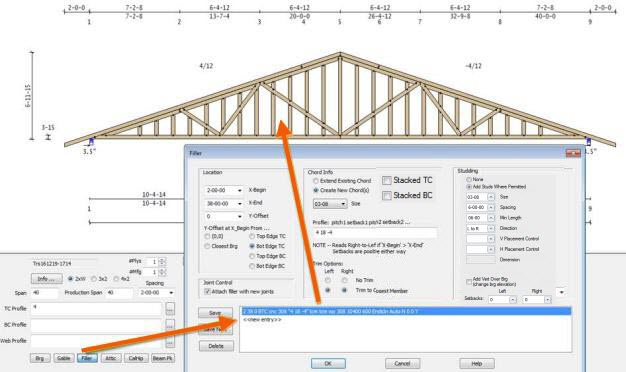
Note: X-End can be to the left of X-Begin, which then places a filler from right-to-left.
Y-Offset - define the height of the filler by selecting a dimension in the drop-down list or by entering a dimension in ffiiss. The height is measured from the selection in Y-Offset at X_Begin From...
Y-Offset at X_Begin From... - click the button next one of the following options to define how the Y-Offset is measured.
(0,0)
Closest Bearing
Top Edge TC
Bot Edge TC
Top Edge B
Bot Edge BC
Extend Existing Chord - make the filler chord part of the original chord instead of creating a break.
Create New Chord(s) - filler chord is not an extension of the original chord; it is a separate piece of board.
Stacked TC - check to add a structural stacked top chord
Stacked BC - check to add a structural stacked bottom chord
Note that you can use both stacked chord options simultaneously. When either option is selected, all of the Filler options are disabled, except for X-Begin, X-End, and Size. Truss Studio auto-trims any stacked members to the nearest webbing left of the Begin location, and right of the End location.
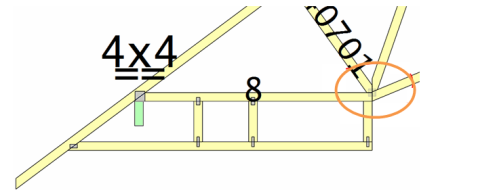
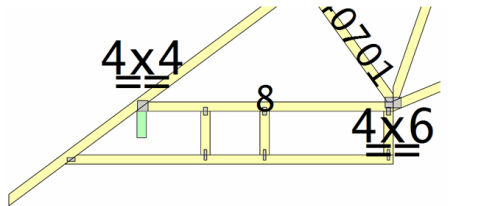
Size - select size of filler chord from drop-down list.
Profile - pitch1 setback1 pitch2 setback2 - define the pitch of the filler chord(s). For more than one pitch, user would add first pitch and distance, second pitch and distance, etc.
Left/ Right
- No Trim - overlapping chords are not trimmed. If this option is selected, the specified location for the X-begin or X-end of the member is used to determine the end point of the stacked member. The end cut of a No Trim member is always plumb.
- Trim to Closest Member - overlapping chords are trimmed. If this option is selected, but there is no web member on that end of the stack to trim to, the specified location is used to determine the end point. Therefore, an untrimmed stacked chord added to a sloped member will always have a vertical (plumb) cut. Square cuts will happen automatically only if the pitch is zero. However, trim lines can be used to modify, if needed. Setting a workline perpendicular to the chord at the point where the end of the stacked chord touches the regular chord and then trimming to that line provides the same length board as input.
Trim to member example
No Trim example

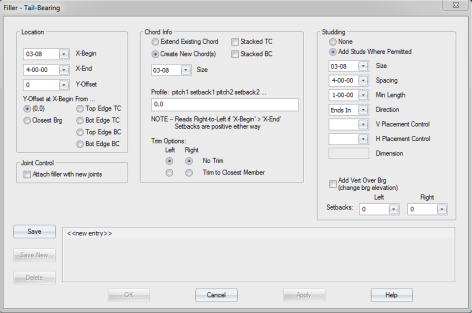
None - select for no studding under or over filler chords
Add Studs Where Permitted - select to add studs based on values in the studding options
Size - select size of filler stud from the drop-down list
Spacing - select stud spacing from the drop-down list or enter a dimension in ffiiss format
Min Length - define minimum length of filler studs to add by selecting from the drop-down list or entering a dimension in ffiiss. Studs shorter than the Min Length dimension are removed.
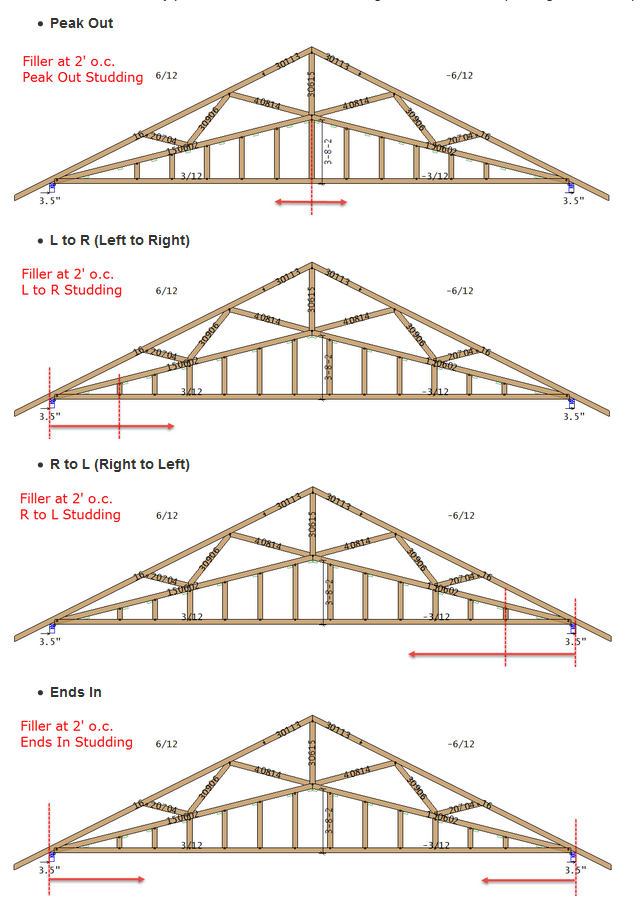
Direction - define direction of stud placement by selecting Left to Right, Right to Left, Ends In or Peak Out from drop-down list.
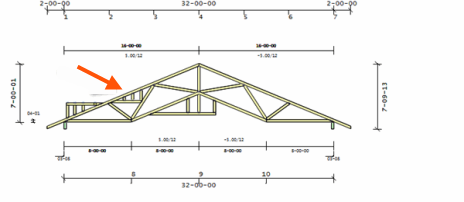
V Placement Control - define vertical stud placement by selecting Auto, Above, or Below from the drop-down list. Generally, Truss Studio will calculate placement automatically; however, you must sometimes specify placement, as shown in the examples below.
H Placement Control - define horizontal stud placement by selecting Left, Centered, or Right from the drop-down list.
Filler set to Above:
Filler set to Below:
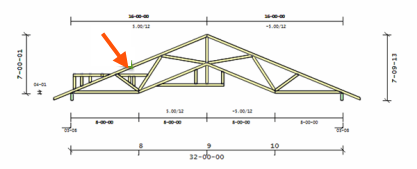
Note: The filler chord is also flipped in the direction of placement.
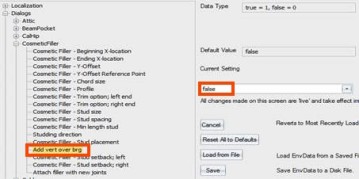
Add Vert Over Brg - Add a bearing below a vertical - by moving the bearing graphic from under the bottom chord to under the filler. (The vertical may or may not exist in the filler already.) Note that the filler is still non-structural and in the analysis, the bearing is considered to be under the sloped bottom chord.
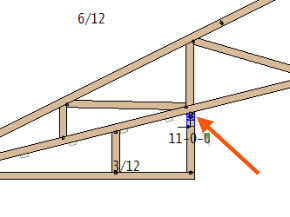
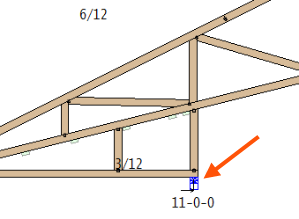
• When this option is checked, Truss Studio automatically places any bearing within the filler area under the filler chord, and will not allow you to move it.
• When this option is unchecked, Truss Studio allows you to place any bearing within the filler area at any location, TC, web, BC, or filler, via the Bearings dialog.
You can turn this option on/off on a case-by-case basis (by using the Add Vert Over Brg option) or completely disable the setting by selecting False in the Env Data settings for Dialogs > Cosmetic Filler.
Setbacks - hold back the last stud from either end of the chord (often used for plant shelves).
- Select from the drop-down list or enter a dimension in ffiiss for left, right, or both.
- To add filler chords and studs, click <<new entry>> and define the values for the new filler in the upper part of the window. Click OK.
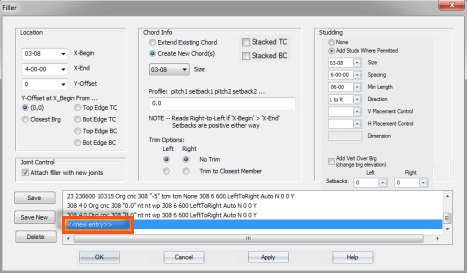
The filler displays in the truss.